 Like me, so many of us are diligently planning our spring gardens. We start our pen-to-paper plans, gather supplies to start our precious seeds, and wait for the weather to turn so we might start working and preparing our beds. But in this idle time we have waiting, you really should be considering inventorying your canning supplies and planning your crop based on your families need.
GETTING YOUR SUPPLIES IN ORDER

It’s a good time to calculate how many jars of pickles, cans of jelly and jam your family typically needs to get you through winter months. I learned this winter that I hadn’t actually canned enough dills to carry me through. Same was for our tomatoes. I’m down to only a few jars of my tomato’s and sauce not having realized how much our family of four would actually go through. I’m a good canner, but my math needs to be honed.
I am now in the process of figuring out how many canning jars and sizes I have vs. what I will need. Same for lids. Since I have to replace dozens of lids, I have opted to invest in reusable Tattler lids after having decided they work beautifully and will save me money in the long run. Another consideration I made was, as a committed prepper, I believe material may be hard to come by. Having to replace my lids every time I can and believing there is even a remote possibility that they may be hard to come by would defeat all my seasonal garden planning.
How many quart jars did I use last year and how many more I need this year was a big question. How much jelly or jam will I put up? How much applesauce or peaches will I need? Obviously, I could never lay out a formula for you, but you really should start planning and pre-planning. And buying your canning supplies now, before the season hits will save you money. Last season I found myself running around looking and buying jars when the prices were their highest. Buy them out-of-season to get the best price.
HERBs, SPICEs AND OTHER INGREDIENTS

Salt, sugar and spices will also be needed. Will you be planting the herbs you will need to can your harvest? Dill is one that is vital to me. Italian herbs are as important.
RESOURCEs AND OTHER EQUIPMENT

You may, like me, wish to scan all your recipes and determine which ingredients you can grow and what you will need to purchase. Start planning now, watch for sales on items you will need to purchase and be sure to stock up on it when it’s most feasible. And your canning books are as important as anything. A few of the VERY best I could recommend are:
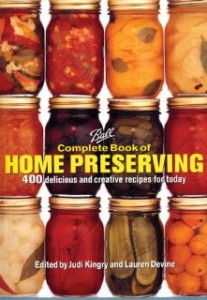
Ball Complete Book Of Home Preserving
Canning is just one aspect to preserving your food. Dehydrating is another. Do you have a dehydrator? You can look on Craigslist or garage sales to find one, but if you are seriously planning on building a food supply, you really need to invest in one. And because dehydrating is sometimes much more than slicing and drying, you will want a great cookbook. The best on the market (by many standards and reviews) is Mary Bell’s Complete Dehydrator Cookbook.
The same is true for a vacuum seal system. I use and would recommend the FoodSaver which is a workhorse. I use it nearly every day and much more in the summer months. All these appliances which allows you to protect and preserve your food may not pay for themselves this season, but they will pay for themselves over time.
LONG TERM STORAGE
Also, if you plan on putting some of your foods into long-term storage, you will need oxygen absorbers and mylar bags. Start asking your bakery and deli department for 5 gallon buckets now. You may also wish to purchase moisture absorbers as an added line of protection for your food. You will need these if you plan to store food. Many local businesses will give them away or sell them for $1 each. But, be sure you get food-grade buckets. You may also wish to invest in high quality gamma lids.
Read Full Post »
 I am really excited to announce that I will now be a contributing writer for the blog at ModernHomesteaders.net. I have been a fan of theirs for awhile and being asked to contribute was very flattering and exciting. I am scheduled to write for them once a week.


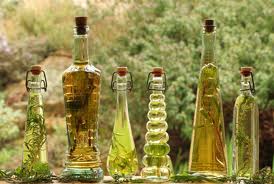 One thing I strive to do in planning my home store, I try to make sure I either have or can make all the things my family and I enjoy in these “good” times. I don’t want to be pulling out buckets of legumes and beans without having the flavors I’m accustom to going into them. Simple things really do make life more comfortable. And this technique to infusing oil is an example of planning to thrive while others struggle to survive. Pay attention to the little things. Those sometimes unnoticeable extra’s that you might take for granted. This recipe was given to me to share by reader Tess Pavlin. She has tried and tweaked this until she was sure it was wonderful and felt comfortable in making it public. Win for us, right?
 as basil or a mixture such as oregano, rosemary and thyme. Crush them to release the flavor into the carrier oil. Make absolutely sure your herbs are completely dry. Water will likely make your oil go rancid.
 After the two weeks, strain off the herbs (use a cotton muslin cloth or an old open weave linen handkerchief) and then repeat the process of infusion with a fresh handful of your herbs (but using the same oil). Do this, as many times as necessary until you have a jar of strongly flavored aromatic oil.
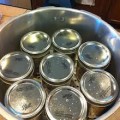
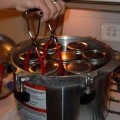
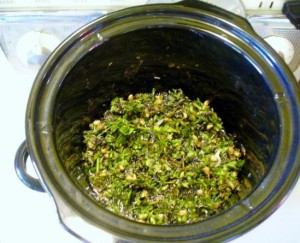 3. CROCK POT INFUSED HOMEMADE OILS – This method can only be used if your crock pot has a “warm” or very low setting! This works great for infusing several oils at once. Fill your sterile pint jars with your herbs and oils. Place the jars in the crock pot and cook on low for eight hours. You can do up to 5 different oils at once with this method depending on the size of your crock pot!
 I don’t have any fresh produce harvest to satisfy my urge to do some canning, so I decided to can some red beans I had in my home store to create another use for them in my home store. Canning from bulk, dry beans saves you a good amount of money and is healthier and tastes better. Having these beans ready for my red beans and rice or chili makes them very convenient, too. I do not add any spices to my beans, not even salt. I prefer to spice them when I decide on which dish I am preparing. However, if you like, you can add spices to yours.


 One of my favorite books for pioneer recipes is
