Feeds:
Posts
Comments

Posts Tagged ‘Food and Related Products’


As we all know, there are great tips and information about gardening, propagating and harvesting food from your garden.  A master gardener I am not.  I feel like I learn something new every day about growing my family’s food.  Watching the TV program, Through The Wormhole, I saw a doctor who is famous for cloning animals use honey as a growth hormone to start new plants in a demonstration for his approach to animal cloning.  I was fascinated because I know there are many uses for honey, but I did not know it was used in this way in the garden.

Lavender with cinnamon Cinnamon growth hormoneI’m sure many of you have seen this post going around Pinterest and FaceBook in using cinnamon as a growth hormone in starting new plants.  Well, I was excited and tried using it to propagate a new, beautiful lavender plant I got this year for Mother’s Day.  More than two weeks into it, I see nothing more than what I started with.  Clearly, the cinnamon will not work with lavender, at least not mine.  But this plant is so beautiful that I want to ensure to have plenty of it for years to come and having several copies of the same plant should help me meet that goal.

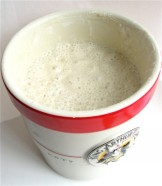
So, because the cinnamon is not working, I am trying honey.  Local and organic as it should offer the best local pollination in my opinion.  The uses for honey is vast.  I’ve seen many articles related to beauty, health and medicinal uses for it.  But I’ve not run across this purpose before I specifically started researching it.  From my research, I’ve decided to use the following recipe.

  • images-61 cup honey
    – Pure, or raw, honey is said to be better than regular store-bought honey (which has been processed) and yields the greatest results.
  • 3 cups boiling water
    – Mix the honey with your boiling water and allow to cool. Place this mixture in an airtight container (such as a mason jar) until ready to use, storing it somewhere away from light.

It sounds simple enough.  If you are interested in trying this method, click this link to find a well written article all about it.  I will let you know if and how this method works in comparison to the cinnamon method.


Read Full Post »


photo copy 6Something to keep in mind about minestrone is that, much like meatloaf, it’s a great way to cook and use up leftover vegetables and no two recipes are the same.  This is a recipe I would be proud to set in front of you at my dinner table.  But you may like more pasta and less potatoes.  You may want vegetables in it that I don’t put in mine.   Mine is a great flavor for how my family likes it.  You can make the adjustments you wish with the basics in this recipe.

This recipe is all adjusted and based on freeze-dried food.  You can use your own or commercially produced dehydrated vegetables, but you will need to adjust your cooking time and amount of water.  There is a significant difference in how they rehydrate and the amount of time and water it will take.  For information about this, please follow this link where I try to answer any questions you may have. Meal In A Jar Newsletter

photo copy 2

Add 100cc oxygen absorbers before closing

While these look beautiful in canning jars, if you want yours in vacuum sealed bag and in mylar, they are perfect to take camping or to keep in your bug out bags.   With these points in mind, here is the recipe.  Below the recipe will be links so that if there are any ingredients you wish to purchase, you can.

photo


You will need

  1. measuring cups
  2. measuring spoons
  3. canning funnel
  4. 100cc oxygen absorbers
Minestrone Soup Meal In A Jar
Recipe Type: Soup
Cuisine: Italian
Author: PrepperPenny
Prep time: 5 mins
Cook time: 45 mins
Total time: 50 mins
Serves: 4
Layer the ingredients in the order by which they are listed. The 1st five ingredients are the base for your soup. You can add whatever vegetables you prefer, but keep in mind that there is about 1 1/3 cups of vegetables total. Keep this in mind as you will need to fit all the ingredients into a 1 quart canning jar.
Ingredients
  • 2/3 C. THRIVE Tomato Powder
  • 1/2 C. THRIVE Freeze-Dried Onion (You can use your own dehydrated flakes)
  • 1 1/2 Tbsp Italian Seasoning
  • 1 1/2 tsp Garlic Powder or Granules
  • 1 Heaping Tbsp Beef Bouillon
  • 3/4 Cup THRIVE Freeze-Dried Ground Beef
  • 1/4 Cup THRIVE Freeze-Dried Sausage
  • 1/2 Cup THRIVE Instant Red Beans
  • 1/3 Cup THRIVE Freeze-Dried Corn
  • 1/3 Cup THRIVE Potato Chunks
  • 1/3 Cup THRIVE Freeze-Dried Green Beans
  • 1/4 Cup THRIVE Freeze-Dried Mixed Green/Red Peppers
  • Top With Pasta of Your Choice
Instructions
  1. Prepare your 1 quart canning jars, lids and bands by sanitizing them with hot, soapy water. You absolutely must make sure all pieces are completely dry. To ensure this, after washing my jars, I put them in an oven at 250* for 30 minutes. Moisture will cause your food to spoil.
  2. Layer these ingredients in the order listed. I purposely didn’t include the option for salt and pepper. I chose to add those and other spices as I cook the recipe. This recipe serves 4-6 adults
  3. If you are making these to keep longer than a few weeks, you MUST place an oxygen absorber on top before you close it and/or use your vacuum seal system to remove the air. These stay fresh and stable for 9-12 months. Wipe the rim of the jar to get a secure, airtight seal.
  4. Bring 8 cups of water to boil. Empty ingredients in and reduce to a simmer for 30-45 minutes. Add water or beef stock for a thinner soup or continue to reduce to thicken it according to your own preference.
Home Store

For these and other THRIVE Food or emergency supplies, please click here to visit my online store.


THRIVE F-D Ground Beef

THRIVE F-D Sausage

THRIVE F-D Corn

THRIVE F-D Green Beans

THRIVE F-D Tomato Powder

THRIVE F-D Potato Chunks

THRIVE F-D Red & Green Bell Peppers

THRIVE Instant Red Beans

Oxygen Absorbers

FoodSaver Vacuum Seal System

Small Mouth Jar Sealing Attachment

Wide Mouth Jar Sealing Attachment


Read Full Post »


garden-feb-lgLike me, so many of us are diligently planning our spring gardens.  We start our pen-to-paper plans, gather supplies to start our precious seeds, and wait for the weather to turn so we might start working and preparing our beds.  But in this idle time we have waiting, you really should be considering inventorying your canning supplies and planning your crop based on your families  need.

GETTING YOUR SUPPLIES IN ORDER


canning_jars.gif

It’s a good time to calculate how many jars of pickles, cans of jelly and jam your family typically needs to get you through winter months.  I learned this winter that I hadn’t actually canned enough dills to carry me through.  Same was for our tomatoes.  I’m down to only a few jars of my tomato’s and sauce not having realized how much our family of four would actually go through.  I’m a good canner, but my math needs to be honed.

I am now in the process of figuring out how many canning jars and sizes I have vs. what I will need.  Same for lids.  Since I have to replace dozens of lids, I have opted to invest in reusable Tattler lids after having decided they work beautifully and will save me money in the long run.  Another consideration I made was, as a committed prepper, I believe material may be hard to come by.  Having to replace my lids every time I can and believing there is even a remote possibility that they may be hard to come by would defeat all my seasonal garden planning.

How many quart jars did I use last year and how many more I need this year was a big question.  How much jelly or jam will I put up?  How much applesauce or peaches will I need?  Obviously, I could never lay out a formula for you, but you really should start planning and pre-planning.   And buying your canning supplies now, before the season hits will save you money.  Last season I found myself running around looking and buying jars when the prices were their highest.  Buy them out-of-season to get the best price.

HERBs, SPICEs AND OTHER INGREDIENTS

Spices

Salt, sugar and spices will also be needed.  Will you be planting the herbs you will need to can your harvest?  Dill is one that is vital to me.  Italian herbs are as important.

RESOURCEs AND OTHER EQUIPMENT

thex2900

You may, like me, wish to scan all your recipes and determine which ingredients you can grow and what you will need to purchase.  Start planning now, watch for sales on items you will need to purchase and be sure to stock up on it when it’s most feasible.  And your canning books are as important as anything.  A few of the VERY best I could recommend are:

Ball Canning Book

Ball Complete Book Of Home Preserving

Canning is just one aspect to preserving your food.  Dehydrating is another.  Do you have a dehydrator?  You can look on Craigslist or garage sales to find one, but if you are seriously planning on building a food supply, you really need to invest in one.  And because dehydrating is sometimes much more than slicing and drying, you will want a great cookbook.  The best on the market (by many standards and reviews) is Mary Bell’s Complete Dehydrator Cookbook.

The same is true for a vacuum seal system.  I use and would recommend the FoodSaver which is a workhorse.  I use it nearly every day and much more in the summer months.   All these appliances which allows you to protect and preserve your food may not pay for themselves this season, but they will pay for themselves over time.

LONG TERM STORAGE

Also, if you plan on putting some of your foods into long-term storage, you will need oxygen absorbers and mylar bags.  Start asking your bakery and deli department for 5 gallon buckets now. You may also wish to purchase moisture absorbers as an added line of protection for your food.  You will need these if you plan to store food.  Many local businesses will give them away or sell them for $1 each.  But, be sure you get food-grade buckets.  You may also wish to invest in high quality gamma lids.


Read Full Post »


IMG_0286
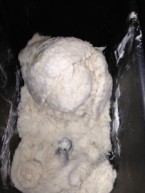
I recently posted the recipe for the sourdough starter I made.  It turned out very, very good.  So of course, I needed to jump right in and start making sourdough bread.  I searched high and low and happened across a recipe to make it in my Emeril’s bread machine.  I was a bit skeptic, but it obviously turned out really good.  Otherwise, I would not be posting it.

Honing skills for making bread it a very important to overall preparedness.  Self-reliance and saving money is what I am all about.  Learning these skills now, before SHTF, will only serve you and your family well when the time comes that you have no choice but to make your own.

Sourdough Bread Ingredients

These simple ingredients (which you likely have) is all it takes, and the machine does all the work!

Yeast, Sugar, Salt

The quality of ingredients are important.  I used Pink Himalayan Salt, raw sugar and bread maker yeast.

Dry Ingredients

I started by dumping 1 cup of flour, the sugar, salt and yeast into the machine and allowed it to mix up a bit.  Here, I have begun the cycle and the machine paddles are running.

Warm Milk

Slowing adding the sourdough starter, warm milk and soft butter to the dry ingredients.  This looks quite wet, but keep going. Next you will add the rest of the flour (2 1/2 cups).

Kneading

At this stage, I added the remaining flour (2 1/2 cups). The kneading is working and you can see how it is looking quite normal.  It is a dry dough.  There were crumbles separate from the mass.  I just pressed it all together and allowed it to finish.  Close the lid and allow your bread machine to finish the work.

NOTE:  Be sure to remove the paddles as soon as it’s done with kneading.  They are a bugger to get out of baked bread!

Sourdough Loaf

Allow your machine to run the complete cycle being sure to set it on dark crust setting.  You can see here, it turns out a beautiful, golden brown.  Remove it from the machine and cool on a wire rack.  But admittedly, we cut right into it.  Superb!

If you don’t have a bread machine or prefer to bake it in your oven, here is how to do that.

Combine your ingredients using exactly the same method and in the order listed for the machine version.  Once all the ingredients are combined, durn the dough onto a lightly floured surface and knead for 8-10 minutes.

Place dough in an oiled bowl, making sure to turn it to oil all surfaces.  Allow it to rise for 1 hour.

Punch down and allow it to rest for 15 minutes.  Now shape it into a load and place in a greased 2 pound loaf pan. Allow it to rise again for another hour.

Bake at 375* for 30 minutes.

Sourdough Bread . . . Bread Machine
Recipe Type: Bread
Cuisine: American
Author: PrepperPenny via Unsophisticook
Prep time: 15 mins
Cook time: 1 hour
Total time: 1 hour 15 mins
This recipe is simple, delicious and works in a bread machine or conventional oven.
Ingredients
  • 3 1/2 Cups All-Purpose Flour
  • 2 Tbps Sugar
  • 2 tsp Salt
  • 2 1/4 tsp Dry Active Yeast
  • 3/4 Cups Warm Milk
  • 1 1/2 Tbsp Softened Butter
  • 1 Cup Sourdough Starter
Instructions
  1. Add 1 cup flour, sugar, salt and yeast to your bread pan. If your bread machine has a warming cycle, turn it off and start a basic bread cycle to stir these ingredients together. Set your machine for a 2 pound, dark crust loaf.
  2. Slowly add warm milk, softened butter and sourdough starter (in this order)
  3. Add remaining 2 1/2 cups of flour slowly into wet mixture.
  4. Close the top of the machine and allow it to finish out its’ cycle.
  5. When done, remove load and allow to cool on a cooling rack.
Notes
Oven Directions: Add 1 cup flour, sugar, salt and yeast to a mixing bowl SLowly stir in warm milk, butter and sourdough starter. Mix remaining 2 1/2 cups of flour – slowly – into mixture. Turn the dough out onto a lightly floured surface. Knead for 8-10 minutes Place dough into an oiled bowl, being sure all surfaces get oiled. Allow to rise for 1 hour Punch down and allow to rest for 15 minutes. Shape into a loaf and place in a greased 2 pound loaf pan. Allow to rise for another hour. Bake at 375* for 30 minutes or until done.


Read Full Post »


Sourdough in Crock
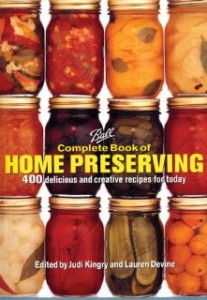
One of my favorite books for pioneer recipes is Cookin With Home Storage by Peggy Layton.  I keep this book on my desk, compared to most which are on a bookshelf.  I’m starting some sourdough and thought I would share what I learned in Peggy’s book.

Sourdough Starter – It wasn’t until the Danish people immigrated to Utah that years was brought to raise the breads.  Before then, they made a started which they called “Sourdough.”  It was made by combining flour, salt and enough warm water to make a spongy dough.  This was put in a crock with a loose lid and kept warm for several days, during which time it bubbled and formed it own yeast.  These breads weren’t as light as yeast breads but the wonderful flavor made up for it.  Sourdough was a favorite of the sheepherders in Sanpete County and still is.  It was used for breads, biscuits , and pancakes.

Dehydrating Your Sourdough Start

You can dry your start and store it for later use.  Spread a very thin layer on a piece of plastic wrap.  Dry it in a dehydrator or allow it to air dry.  When one side is dry, turn it over to allow it to dry on that side.  When it is completely dry, break it into pieces and grind it into a powder.  Store in an airtight container in your refrigerator.  To re-start it, just add water or milk until you get it back to the original consistency.  When using a reactivated starter, allow it to set at room temperature for 8 hours.

Sourdough Starter
Author: PrepperPenny via Peggy Layton
Prep time: 5 mins
Total time: 5 mins
Almost any recipe can be changed to use sourdough. To make it work you have to control the leavening and keep the thickness or moisture the same. If the recipe calls for baking powder, leave a teaspoon out. If no but your results are too heavy, put a little baking powder in it. You may need to experiment a little.
Ingredients
  • 2 1/2 C Warm Water
  • 2 1/2 C. Flour
  • 1 tsp Active, dry yeast
Instructions
  1. Stir together and allow it to set for 3-5 days in a warm place to ferment.
Notes
Save 1 cup from every batch to add more flour and milk to keep your starter going. Use in pancakes, biscuits and breads!


Read Full Post »


teriyaki-sauceHow many dishes do you make that calls for teriyaki sauce?  If you don’t already use this delicious, sweet and spicy condiment, you should look at your chicken or beef at a different angle.  This sauce is one of my families favorites.   This is a great addition to your home store.

Homemade Teriyaki Sauce
Recipe Type: Sauce
Author: PrepperPenny
Prep time: 5 mins
Cook time: 5 mins
Total time: 10 mins
Ingredients
  • 1/4 cup soy sauce – Make your own with my recipe linked below
  • 1 cup water
  • 1/2 teaspoon ground ginger
  • 1/4 teaspoon garlic powder
  • 5 tablespoons packed brown sugar – Make your own with my recipe linked below
  • 1 -2 tablespoon honey
  • 2 tablespoons cornstarch
  • 1/4 cup cold water
Instructions
  1. Mix everything EXCEPT cornstarch and 1/4 C of your water in a sauce pan and begin heating.
  2. Mix cornstarch and cold water in a cup and dissolve. Add to sauce in pan.
  3. Heat until sauce thickens to desired thickness.
  4. Add water to thin it if you prefer
  5. Store in an airtight container in the refrigerator for at least 6 months.

Make your own Soy Sauce.  Get the recipe by clicking here.

Make your own Brown Sugar.  Get the recipe by clicking here.

Read Full Post »


Soy Sauce

Here is another easy and shelf-stable recipe to help you in building your home store.  There are many uses for soy sauce.  Making your own is cheap, easy and more delicious than commercially produced sauces.  I use it as a spice in meatloaf, soups and stews.  And if you are a DIY junkie, you have the ingredients already in your home.  If not, I have linked products for this recipe below for your convenience.


Soy Sauce
Recipe Type: Spice
Author: PrepperPenny
Prep time: 5 mins
Total time: 5 mins
Serves: 2 cups
Ingredients
  • 1-1/2 cups boiling water
  • 4 Tbsp Beef Bouillon
  • 4 Tbsp Cider Vinegar
  • 1 Tbsp Dark Molasses
  • 1 tsp sesame seed oil
  • pinch of black pepper
Instructions
  1. Whisk all ingredients together until dissolved and pour into an airtight container. May be refrigerated indefinitely.

THRIVE beef-bouillon

Read Full Post »


Sweet Mayo Whip

Why buy commercially made food when you can make it better, cheaper and in the convenience of your own home?  My family doesn’t like mayo.  We love Miracle Whip.  But I know from experience that homemade anything tastes better than about anything I have bought in a store.

Here is a perfect example.  This is a delicious recipe for Miracle Whip that allows you to refine the amounts of the ingredients to customize the flavors you love the most.  I tweaked mine with more lemon juice and vinegar to give it a bit more tartness.  You may like adding more garlic or using less salt.  You are in control.

Because I have such a complete home store and have my own chickens, this cost me only the price for the vegetable oil I used.  All the other ingredients are things I have, grow or raise.  This is the versatility and flexibility I have in using ingredients I keep in my home that allows me to make commercial products we used to buy.

Learning these skills now, before you will need them in a SHTF scenario is important.  Every time you learn to make something new, from scratch will prepare you and your family to enjoy a diet and foods that you are accustomed to without having to make sacrifices many may face.

MrPrepper always likes the food I make.  But with this, he actually told me that it was the best he ever tasted.  Believe me.  That was a 5-Star rating!


Sweet Mayo Whip
Recipe Type: condiment
Author: PrepperPenny
Prep time: 20 mins
Cook time: 3 mins
Total time: 23 mins
Like commercial Miracle Whip, this recipe is a deeper and richer flavor. If you prefer Miracle Whip over Mayo like I do, you will certainly want to try this recipe
Ingredients
  • 2 Egg Yolks
  • 1 Tsp Sea Salt
  • 2 Tbsp Powdered Sugar
  • 2 Tbs Real Lemon Juice
  • 3 Tbs Vinegar
  • 1 1/2 C Vegetable Oil
  • 1 1/2 Tbsp Corn Starch
  • 1 1/2 Tsp Dry Mustard
  • 1/2 C Boiling Water
  • 1/2-1 Tsp Garlic Powder
  • Pinch of Paprika (Optional)
Instructions
  1. Using a blender or hand mixer, whip the first 4 ingredients well.
  2. Very slowly, drizzle oil into egg mixture while continuing to mix
  3. Add vinegar then let this set while you prepare the next stage
  4. In a separate bowl, mix cornstarch and mustard until fully incorporated
  5. Add this mixture into boiling water using a whisk briskly to blend it. In only a moment or so, it will become the consistency of pudding. Remove from heat source.
  6. Very slowly, add the hot cornstarch mixture into the egg mixture while whipping it with your mixer.
  7. Once it becomes recognizably gelatinous, add your garlic and paprika (optional).
  8. Refrigerate in an airtight container and use as you normally would.


Read Full Post »


Dry Italian Spice Mix
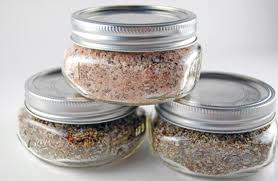
Spice mixes are one of my especially favorite homemade products that I keep in my home store.  This recipe in particular is an all-time favorite.   If you are an avid or prolific gardener, you could literally grow nearly every ingredient here, except for the pepper and salt.  Grow your herbs, dry or dehydrate them and you know you are using organic or pesticide free ingredients.  I typically quadruple this recipe so I always have it available.  For me, it’s all about stocking my home store for cost savings, health and convenience.  This recipe meets all these standards.  Using this recipe also saves you money over the store-bought envelopes.  And you control the ingredients!

I will post a great Italian beef sandwich recipe soon.  It’s a recipe my family absolutely loves.  And it’s incredibly easy using this spice mix.


Dry Italian Seasoning Mix
Recipe Type: Spice Mix
Cuisine: Italian
Author: PrepperPenny
Prep time: 5 mins
Total time: 5 mins
No need to buy commercially produced spice blends. You can make them yourself. Plus, you can adjust the spices to make it unique to personal taste!
Ingredients
  • 1 Tablespoon Garlic Salt
  • 1 Tablespoon Onion Powder
  • 1 Tablespoon granulated Sugar
  • 2 Tablespoons Dried Oregano
  • 1 teaspoon Ground Black Pepper
  • 1/4 teaspoon Dried Thyme
  • 1 teaspoon Dried Basil
  • 1 Tablespoon dried parsley
  • 1/4 teaspoon Celery Salt
  • 2 Tablespoons Salt
Instructions
  1. Combine ingredients and store in and airtight container.
Notes
To Make Italian Dressing 1/4 Cup Balsamic Vinegar ~ 1/3 Cup Canola Oil ~ 2 Tablespoons Water ~2 Tablespoons of Mix. Combine and shake vigorously. . . . Enjoy!


Read Full Post »


Spice Mixes

Making your own spice blends has many advantages.  They are usually less expensive than commercial brands.  You control the ingredients so you have control of things like sodium content.  Homemade is usually much richer with deeper flavors and you are working to add to your own home store.


Homemade Fajita Mix
Cuisine: Mexican
Author: PrepperPenny
Prep time: 5 mins
Total time: 5 mins
Don’t buy it in those envelopes. They are expensive. Besides, this mix is much better, flavorful, easy and cheap to make.
Ingredients
  • 1 1/2 teaspoonCumin; ground
  • 1/2 teaspoonOregano; dried, crushed
  • 1/4 teaspoonSalt
  • 1/4 teaspoonRed pepper; ground
  • 1/4 teaspoonBlack pepper; ground
  • 1/8 teaspoonGarlic powder
  • 1/8 teaspoonOnion powder
Instructions
  1. Simply combine all ingredients in an airtight container, shake to mix and store as you would with any other spice mix. Use exactly as you would for the pre-made stuff.


Read Full Post »

Older Posts »

Home

Writer. Teacher. Storyteller.

Diane Ravitch's blog

A site to discuss education and democracy

My Foray Into Food Storage

A regular gal learning about Food Storage, Home Cooking, Canning, Gardening, and more!

Perma Dub Dream

Creative Mindful Lifestyle

Bring me my coffee

Just another WordPress.com site

Cozycakes Cottage

Celebrating the Comforts of Home

Red Shaman Intergalactic Ascension Mission

2007-2015 Indian in the machine blog.... visit www.indianinthemachine.com for personal website, and www.ournewworldnews.com for latest news.

The Rebel Sheep

Nap Time = Go Time!

WordPress.com

WordPress.com is the best place for your personal blog or business site.

Daily Truth Pills

Hosea 4:6 My people are destroyed for lack of knowledge...

Walther and Me

A place to discuss my journey into the world of guns along with anything else on my mind.

Survival Total Access

The Why, What and How of Your Emergency Preparedness, Survival Food, Gear and Financial Preparation

SuburbanResilience

Surviving the Erosion of the Middle Class: A Single Dad's Quest for Self-Reliance