Feeds:
Posts
Comments

Posts Tagged ‘Recipe’


pictures_with_words copy 6Nectar of the gods. . . glorious coffee.  I can’t imagine my life without it.  No only for its amazing flavor and energy boost is offers, but as images-14one who suffers with migraines, caffeine has been prescribed to me to help control them.  For me, it works really well.  As much as I love my morning cup (or 2, or 3) of java, hot coffee is not appetizing in the middle of the day during the hottest parts of summer.  Iced coffee is always a great option which I partook in by stopping at a local espresso stand drive thru, but at nearly $6 for a large double shot, it can get really expensive.  Besides that, I’m busy in the garden most summer days.  I don’t have time to get to the coffee shops.  My solution?  Making it myself for a fraction of the cost.  If you love your iced coffee, you really need to try this simple and delicious recipe.  It just might destroy the relationship between you and your favorite barista.  Honestly, no coffee-house has anything better than this blend.  And you will save a LOT of money!

I had a pound of whole coffee beans in my freezer that I used in this demonstration.  However, a rough ground bag is just as good.  Buy the least expensive brand you can get at your local supermarket works just as well as the expensive ones.  So save yourself some money and avoid the expensive brands.

Plus, you will be getting three separate recipes in this one post.  Obviously the iced coffee.  But I will show you how to make vanilla extract that you can use to make your own creamer!  Check out the links and video.

Now, gather a few things you will need:


pictures_with_words copy 8 1 pound course ground coffee – I keep my coffee beans whole and grind them as I need them.  For this large batch, I use my wonderful Ninja. But you can buy whole beans at the store and grind them on the course setting next to the whole beans (if you grocer offers them).

1 gallon plus 1 quart warm water – This will yield right at a full gallon of espresso-type coffee

PrepperPenny’s Vanilla Creamer using my homemade Vanilla Extract (check out my You Tube video at the end of this page)

Large air-tight container – Tall and thin or short and round, just make sure it is airtight and will allow your coffee to stay saturated

Colander(s) – As you will see, I use several sizes to make sure my grounds are completely removed and my espresso is dark and rich but not foggy


Pour luke warm water over coffee grounds

Pour luke warm water over coffee grounds

Simply empty your 1 pound of coffee into your container and pour warm water over it.

IMG_1586

Place in airtight container and refrigerate for 24 hours

In a large, airtight container, pour 1 gallon plus 1 quart of warm water.  Give a quick stir to moisten all grounds and place the lid on.  Place in your refrigerator for 24 hours.

pictures_with_words copy 3

Straining equipment

You are almost done.  No stirring  or shaking.  After 24 hours, you have en amazingly strong cold espresso.  Now you need to strain it several times until you have removed any debris.  I start with a larger colander first, move to a finer mesh and finish with butter cloth.  You want to be sure to strain it enough to make a dark, rich coffee without any trace of the coffee grounds, otherwise your coffee will become cloudy.

pictures_with_words copy 4

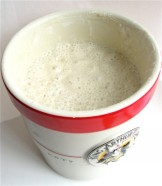
Dark enough that you can’t see through it

Your coffee will be  dark and strong you will not be able to see through it!  That’s exactly what you want.

pictures_with_words copy 2

Now it’s time to assemble your iced coffee.   This is where you will use a combination to meet your specific taste.  I like my iced coffee creamy, so I mix coffee and creamer at a 50/50 ratio.  If you like stronger coffee, use less creamer and more coffee.  You can use your favorite plain or flavored creamer, the same kind you might buy in the grocers.  I make my own vanilla creamer which is what I use.  Click here for that simple recipe.

Add sugar or favorite sweetener, top with whipped cream and enjoy!  From experience, I can say that it will keep well in your refrigerator for at least two weeks.  Beyond that, it’s trial.  Mine has never made it past that two-week mark.

Iced Coffee

Rich iced coffee

Kick it into the stratosphere and make your own vanilla extract to use in your own creamer.  This is my video to make your own extract.  It’s great in this recipe and amazing for all recipes calling for it.

Read Full Post »


Retro Wife


Self reliance and saving on your grocery bill requires the ability to make things at home from basic supplies, much of which are found in your long-term storage.  Here is a great recipe for fail-safe buttermilk biscuits offered by reader Lisa Anglin.

After two years of dating and twenty-five years of marriage, my husband told me I have finally succeeded at making biscuits. You would NOT believe the trials and errors I have gone through. These biscuits were easy to make and sooooo good! I just wanted to share the recipe with you and any of your readers that might be interested. Lisa

Buttermilk Biscuits
Recipe Type: Bread
Cuisine: American
Author: Laura Salisbury, Lazy Ladder Ranch 1985
Prep time: 20 mins
Cook time: 15 mins
Total time: 35 mins
Serves: 2 dozen
After two years of dating and twenty-five years of marriage, my husband told me I have finally succeeded at making biscuits. You would NOT believe the trials and errors I have gone through. These biscuits were easy to make and sooooo good! I just wanted to share the recipe with you and any of your readers that might be interested. ~ Lisa Anglin
Ingredients
  • 1 pkg. dry yeast (2 1/4 tsp)
  • 1/2 cup water (warm)
  • Add to yeast mixture:
  • 5 cups flour
  • 1/2 cup sugar
  • 2 cups buttermilk
  • 1 teaspoon salt
  • 1/3 teaspoon baking soda
  • 1/2 cup shortening
Instructions
  1. Stir until well mixed. A little more flour may be needed so dough is not sticky. Put saran wrap over bowl and place in refrigerator until ready to roll out (I skipped this step since I was making them for supper).
  2. Bake at 400 degrees F for 15-20 minutes. Makes about 2 dozen regular size biscuits.
  3. Roll or pat out on well-floured board. Cut with cutter of desired size. Place in well-greased pan (I used a tin-foil covered pizza pan coated with butter). These will keep in refrigerator and can be baked as needed. These biscuits are halfway between rolls and biscuits and are delicious (I’ll vouch for that! The dough is somewhat sweet).


Read Full Post »


Sourdough in CrockOne of my favorite books for pioneer recipes is Cookin With Home Storage by Peggy Layton.  I keep this book on my desk, compared to most which are on a bookshelf.  I’m starting some sourdough and thought I would share what I learned in Peggy’s book.

Sourdough Starter – It wasn’t until the Danish people immigrated to Utah that years was brought to raise the breads.  Before then, they made a started which they called “Sourdough.”  It was made by combining flour, salt and enough warm water to make a spongy dough.  This was put in a crock with a loose lid and kept warm for several days, during which time it bubbled and formed it own yeast.  These breads weren’t as light as yeast breads but the wonderful flavor made up for it.  Sourdough was a favorite of the sheepherders in Sanpete County and still is.  It was used for breads, biscuits , and pancakes.

Dehydrating Your Sourdough Start

You can dry your start and store it for later use.  Spread a very thin layer on a piece of plastic wrap.  Dry it in a dehydrator or allow it to air dry.  When one side is dry, turn it over to allow it to dry on that side.  When it is completely dry, break it into pieces and grind it into a powder.  Store in an airtight container in your refrigerator.  To re-start it, just add water or milk until you get it back to the original consistency.  When using a reactivated starter, allow it to set at room temperature for 8 hours.

Sourdough Starter
Author: PrepperPenny via Peggy Layton
Prep time: 5 mins
Total time: 5 mins
Almost any recipe can be changed to use sourdough. To make it work you have to control the leavening and keep the thickness or moisture the same. If the recipe calls for baking powder, leave a teaspoon out. If no but your results are too heavy, put a little baking powder in it. You may need to experiment a little.
Ingredients
  • 2 1/2 C Warm Water
  • 2 1/2 C. Flour
  • 1 tsp Active, dry yeast
Instructions
  1. Stir together and allow it to set for 3-5 days in a warm place to ferment.
Notes
Save 1 cup from every batch to add more flour and milk to keep your starter going. Use in pancakes, biscuits and breads!


Read Full Post »


Spicy Mustard Ranch Mix

Another spice mix that will be a wonderful addition to your home store.  Use as a salad dressing, veggie dip, chip dip and even as a sauce for a yummy baked chicken dish.

Zingy Mustard Ranch Mix
Recipe Type: Condiment
Author: iVillage.com
Prep time: 5 mins
Total time: 5 mins
Ingredients
  • 1/2 cup buttermilk powder
  • 1/4 cup dried parsley
  • 1 Tbs dried chives
  • 2 tsp dried dill
  • 2 tsp dried whole basil leaves
  • 2 tsp Dry Mustard
  • 2 tsp Kosher Salt
  • 1 tsp Garlic Powder
  • 1 tsp Onion Powder
  • 1/2 tsp Pepper
Instructions
  1. To make ranch dressing or dip, mix 1/2 cup mayonnaise and 1/2 cup milk (or buttermilk) with 2 to 3 tablespoons of the mix, depending on how strong you like it. This seasoning mix is great as a dry rub for fish or chicken, and you can also sprinkle it on hot buttered popcorn or oven fries.
Notes
Combine and store in an airtight container


Read Full Post »


Stack of Pancakes 
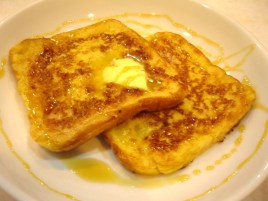
Are you one who will buy frozen waffles, pancakes or French toast for the kids, just for the convenience of having them on a very busy morning where you might be running late?  I’m sure we all have.  But I hate how the ice crystals build up in them because they are packaged so poorly.  How about making your own for a mere fraction of the cost!

Stack of Waffles

One habit I have developed through my road to preparedness is almost always making large batches of anything I make.  If it’s meatloaf, instead of making one for dinner, I will make 4 and freeze 3.  It takes the same amount of time and you cut your cooking time by 1/4th because the next 3 meals need only to be reheated.   If I make soup, I make HUGE batches and can the leftovers so we can enjoy a quick, healthy and homemade meal without making it from scratch every time.  By doing this, you are saving yourself a lot time and having meals available if you suddenly find yourself in an emergency from power outages, storms or even having too much month left when the money is gone!  If you start thinking along these lines, you will be amazed how quickly and how much food you build up in your home store.

French-Toast w/a Heart

Now back to breakfasts.  I priced store-bought brands for these because they are less expensive than Eggos and other national brands.  But on average, even on sale, a 10-pack of store-brand waffles cost approximately $2.25.  Pancakes prices the same.  If you will simply make you own waffle or pancake mix from scratch using your own recipe or from my Master Pancake/Waffle Mix Recipe  and take an extra 30 minutes to an hour, you can fill your freezer with them for only pennies.

Here is exactly how I freeze mine.  This is one option.  To keep ice crystals from building;

1) Allow them to cool;  2) Lay them in a single layer on a cookie sheet and place them in your freezer until they freeze; 3) Bring them out and wrap them tightly in plastic wrap to prevent crystals from forming.  Or the best way is vacuum seal them in a FoodSaver if you have one.  I put mine together 2 or 4 in a bag so I can grab only what I need.


Read Full Post »


teriyaki-sauceHow many dishes do you make that calls for teriyaki sauce?  If you don’t already use this delicious, sweet and spicy condiment, you should look at your chicken or beef at a different angle.  This sauce is one of my families favorites.   This is a great addition to your home store.

Homemade Teriyaki Sauce
Recipe Type: Sauce
Author: PrepperPenny
Prep time: 5 mins
Cook time: 5 mins
Total time: 10 mins
Ingredients
  • 1/4 cup soy sauce – Make your own with my recipe linked below
  • 1 cup water
  • 1/2 teaspoon ground ginger
  • 1/4 teaspoon garlic powder
  • 5 tablespoons packed brown sugar – Make your own with my recipe linked below
  • 1 -2 tablespoon honey
  • 2 tablespoons cornstarch
  • 1/4 cup cold water
Instructions
  1. Mix everything EXCEPT cornstarch and 1/4 C of your water in a sauce pan and begin heating.
  2. Mix cornstarch and cold water in a cup and dissolve. Add to sauce in pan.
  3. Heat until sauce thickens to desired thickness.
  4. Add water to thin it if you prefer
  5. Store in an airtight container in the refrigerator for at least 6 months.

Make your own Soy Sauce.  Get the recipe by clicking here.

Make your own Brown Sugar.  Get the recipe by clicking here.

Read Full Post »


Sweet Mayo Whip

Why buy commercially made food when you can make it better, cheaper and in the convenience of your own home?  My family doesn’t like mayo.  We love Miracle Whip.  But I know from experience that homemade anything tastes better than about anything I have bought in a store.

Here is a perfect example.  This is a delicious recipe for Miracle Whip that allows you to refine the amounts of the ingredients to customize the flavors you love the most.  I tweaked mine with more lemon juice and vinegar to give it a bit more tartness.  You may like adding more garlic or using less salt.  You are in control.

Because I have such a complete home store and have my own chickens, this cost me only the price for the vegetable oil I used.  All the other ingredients are things I have, grow or raise.  This is the versatility and flexibility I have in using ingredients I keep in my home that allows me to make commercial products we used to buy.

Learning these skills now, before you will need them in a SHTF scenario is important.  Every time you learn to make something new, from scratch will prepare you and your family to enjoy a diet and foods that you are accustomed to without having to make sacrifices many may face.

MrPrepper always likes the food I make.  But with this, he actually told me that it was the best he ever tasted.  Believe me.  That was a 5-Star rating!


Sweet Mayo Whip
Recipe Type: condiment
Author: PrepperPenny
Prep time: 20 mins
Cook time: 3 mins
Total time: 23 mins
Like commercial Miracle Whip, this recipe is a deeper and richer flavor. If you prefer Miracle Whip over Mayo like I do, you will certainly want to try this recipe
Ingredients
  • 2 Egg Yolks
  • 1 Tsp Sea Salt
  • 2 Tbsp Powdered Sugar
  • 2 Tbs Real Lemon Juice
  • 3 Tbs Vinegar
  • 1 1/2 C Vegetable Oil
  • 1 1/2 Tbsp Corn Starch
  • 1 1/2 Tsp Dry Mustard
  • 1/2 C Boiling Water
  • 1/2-1 Tsp Garlic Powder
  • Pinch of Paprika (Optional)
Instructions
  1. Using a blender or hand mixer, whip the first 4 ingredients well.
  2. Very slowly, drizzle oil into egg mixture while continuing to mix
  3. Add vinegar then let this set while you prepare the next stage
  4. In a separate bowl, mix cornstarch and mustard until fully incorporated
  5. Add this mixture into boiling water using a whisk briskly to blend it. In only a moment or so, it will become the consistency of pudding. Remove from heat source.
  6. Very slowly, add the hot cornstarch mixture into the egg mixture while whipping it with your mixer.
  7. Once it becomes recognizably gelatinous, add your garlic and paprika (optional).
  8. Refrigerate in an airtight container and use as you normally would.


Read Full Post »


Garlic Fondue

Author: Epicurious.com
Prep time: 5 mins
Cook time: 20 mins
Total time: 25 mins
Keep the vampires at bay! Garlic fondue recipe that you will be proud to serve.
Ingredients
  • 1 pound Swiss cheese, grated
  • 1/2 Gruyère cheese, grated
  • 3 tablespoons all purpose flour
  • 1 teaspoon ground nutmeg
  • 1/2 teaspoon ground white pepper
  • 1 1/4 cups (about) dry white wine
  • 3 large garlic cloves, minced
Instructions
  1. Heat water and Magic Mix in a saucepan over low/medium heat until smooth and creamy.
  2. Combine both cheeses, nutmeg, and white pepper in large bowl; toss to coat. Bring 1 cup wine and garlic to simmer in a heavy large saucepan over low heat. Add cheese mixture by handfuls, whisking until melted and smooth after each addition.
  3. Mix in more wine by tablespoonfuls to reach desired consistency. Transfer to fondue pot.
  4. Set fondue over candle or canned heat. Serve fondue with bread.
  5. Read More http://www.epicurious.com/recipes/food/views/Garlic-Cheese-Fondue-4201#ixzz2JwGouM8J


Read Full Post »


Taco Seasoning Mix

Recipe Type: Spice
Cuisine: Mexican
Author: PrepperPenny
Prep time: 5 mins
Total time: 5 mins
Serves: 1
Spice mixes are shelf stable and can be stored for 6 months to 1 year. I find it more efficient to double or even quadruple it.
Ingredients
  • 2 teaspoons hot chili powder
  • 1 1/2 teaspoons paprika
  • 1 teaspoon onion powder
  • 1/2 teaspoon sea salt
  • 1/2 teaspoon garlic powder
  • 1/2 teaspoon ground cumin
  • 1/2 teaspoon oregano
  • 1/4 teaspoon freshly ground black pepper, or to taste
  • 1 pinch cayenne pepper, or to taste (optional)
  • 1 pinch red pepper flakes, or to taste (optional)
Instructions
  1. Combine and store in an airtight container. Each recipe makes 2 tablespoons of mix, equivalent to one commercially packaged mix.
  2. TO USE: Add to cooked ground beef with 1/2 – 1 cup of water and cook until water is completely reduced.


Read Full Post »


Magic Alfredo


Alfredo Sauce has never been so easy and convenient.  Using your Magic Mix  as the base to any cream sauce, you have this ~ and many more great home-cooked meals ready in only a few moments without all the traditional prep work.  Enjoy!

Magic Alfredo

Recipe Type: Dinner
Cuisine: Italian
Author: PrepperPenny
Prep time: 5 mins
Cook time: 15 mins
Total time: 20 mins
Serves: 4
You can add 1/2 C. Pesto Sauce with the Parmesan to make a delicious Pesto Alfredo!
Ingredients
  • 2/3 cup Magic Mix
  • 1 cup water
  • 1 cup Parmesan cheese
Instructions
  1. Combine Magic Mix and liquid in saucepan over medium heat. Stir constantly until thickens. Add cheese and heat until melted. Serve over your favorite pasta.


Read Full Post »

Older Posts »

Home

Writer. Teacher. Storyteller.

Diane Ravitch's blog

A site to discuss education and democracy

My Foray Into Food Storage

A regular gal learning about Food Storage, Home Cooking, Canning, Gardening, and more!

Perma Dub Dream

Creative Mindful Lifestyle

Bring me my coffee

Just another WordPress.com site

Cozycakes Cottage

Celebrating the Comforts of Home

Red Shaman Intergalactic Ascension Mission

2007-2015 Indian in the machine blog.... visit www.indianinthemachine.com for personal website, and www.ournewworldnews.com for latest news.

The Rebel Sheep

Nap Time = Go Time!

WordPress.com

WordPress.com is the best place for your personal blog or business site.

Daily Truth Pills

Hosea 4:6 My people are destroyed for lack of knowledge...

Walther and Me

A place to discuss my journey into the world of guns along with anything else on my mind.

Survival Total Access

The Why, What and How of Your Emergency Preparedness, Survival Food, Gear and Financial Preparation

SuburbanResilience

Surviving the Erosion of the Middle Class: A Single Dad's Quest for Self-Reliance